Charge Anywhere is a payment processing solution that provides a seamless and secure payment experience for merchants and customers. The platform offers a range of payment processing options, including credit card processing, mobile payments, and e-commerce solutions. To make it easier for ZenCart store owners to accept payments, Charge Anywhere has developed a ZenCart Extension that simplifies the integration process. In this article, we will discuss the features and benefits of the Charge Anywhere ZenCart Extension and provide a step-by-step guide for its installation.
Features and Benefits of Charge Anywhere ZenCart Extension
The Charge Anywhere ZenCart Extension allows merchants to accept payments from customers using various payment methods such as debit and credit cards (Visa, Mastercard. Amex Discover, Union Pay, and JCB) and electronic fund transfer (ACH). The platform’s features and benefits include the following:
- Multiple Payment Methods: Charge Anywhere ZenCart Extension supports multiple payment methods. Customers can choose the payment method they prefer during the checkout process, which makes the payment process more convenient for them.
- Secure Payments: Charge Anywhere ZenCart Extension is built with the latest security standards, ensuring that customer data is protected at all times. The extension supports PCI DSS compliance, which is an industry-standard for secure payment processing.
- Customizable Payment Settings: The extension provides merchants with the flexibility to customize their payment settings according to their business needs. Merchants can set up minimum and maximum transaction amounts, chargeback fees, and more.
- Easy Integration: The Charge Anywhere ZenCart Extension is easy to install and configure, with a simple setup process that allows merchants to start accepting payments quickly.
Benefits of Charge Anywhere:
- Easy mode switching: The extension can be configured for both sandbox and production accounts, making it easy to switch between modes.
- Gateway email option: The extension provides a gateway email option for both the vendor and customer, ensuring seamless communication.
- No private SSL required: The extension does not require a private SSL, reducing the hassle and cost of acquiring one.
- Transaction types: The extension supports both authorization and capture transaction types, providing flexibility to users.
- Refund option: The extension provides a refund option, allowing users to customize the refund status.
- Capture option: The extension provides a refund option, allowing users to customize the capture status.
Installing Charge Anywhere ZenCart Extension
Installing the Charge Anywhere ZenCart Extension is a simple process that can be completed in a few steps. Here is a step-by-step guide to help you get started:
Step 1: Download the Extension
Download the Charge Anywhere ZenCart Extension from the Charge Anywhere website or the ZenCart marketplace.
Step 2: Extract and upload the Extension Package
- Extract the contents of the ZIP file to your local computer using an extraction program such as WinZip, WinRAR, or 7Zip.
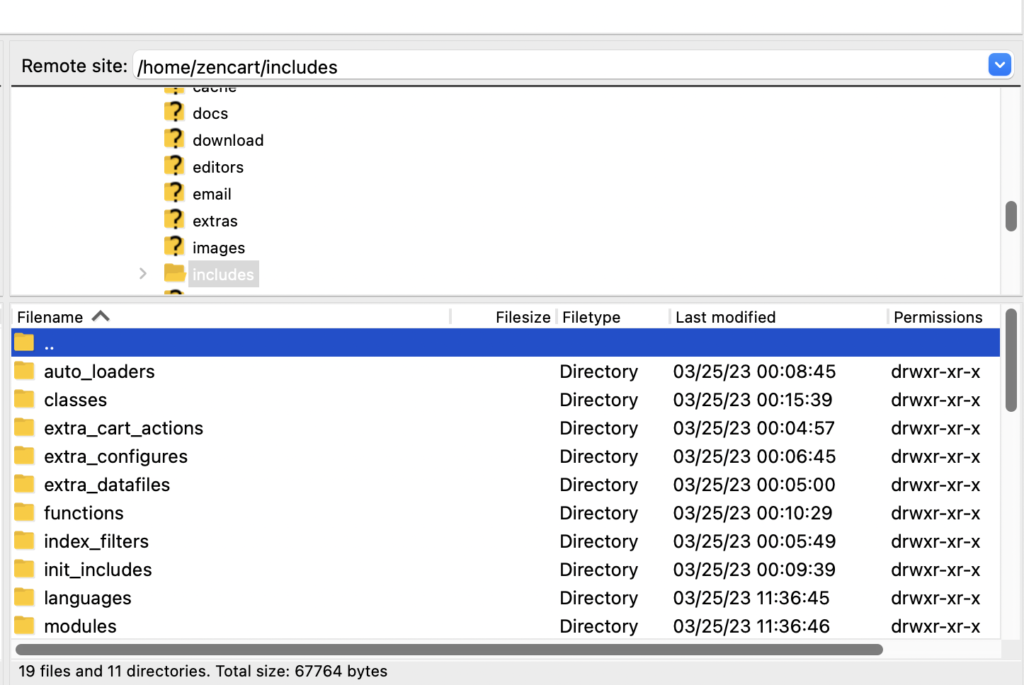
- From the extracted files, locate the
includedirectory. - Now connect to your ZenCart store using an FTP client. You can also refer, refer to this FTP connection guide for step-by-step instructions on making a connection to your server, using FTP.
- After making a secure FTP connection, upload the extracted
includesto merge its content to the/includesdirectory of your ZenCart store. Beware! this will not overwrite any existing file.
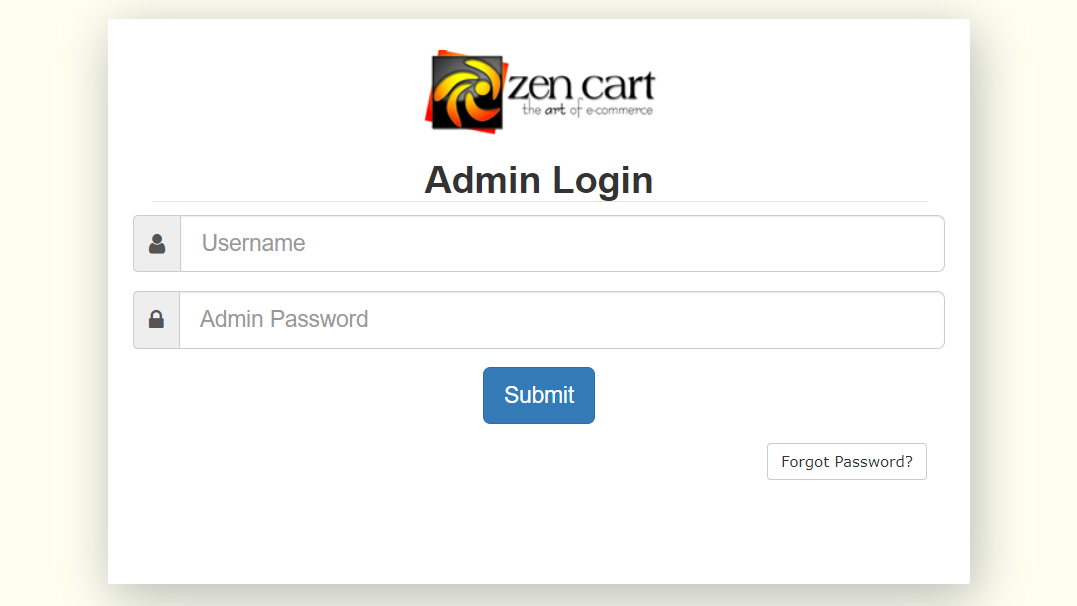
Step 4: Log in to your ZenCart
Log in to your ZenCart store’s admin panel.
Step 5: Navigate to the Payments Page
- Using the main menu navigate to the
Modules > Paymentpage.
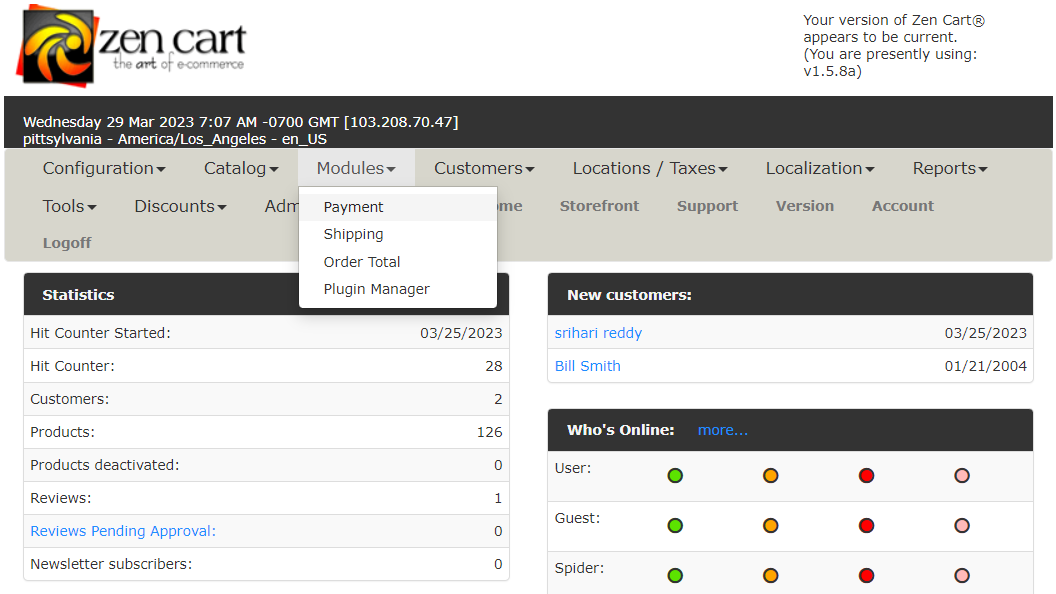
- Within the list of Payment Modules, locate the “Charge Anywhere” module. When you find it, click Install Module.

- Similarly, using the main menu navigate to the
Modules > Order Totalpage.
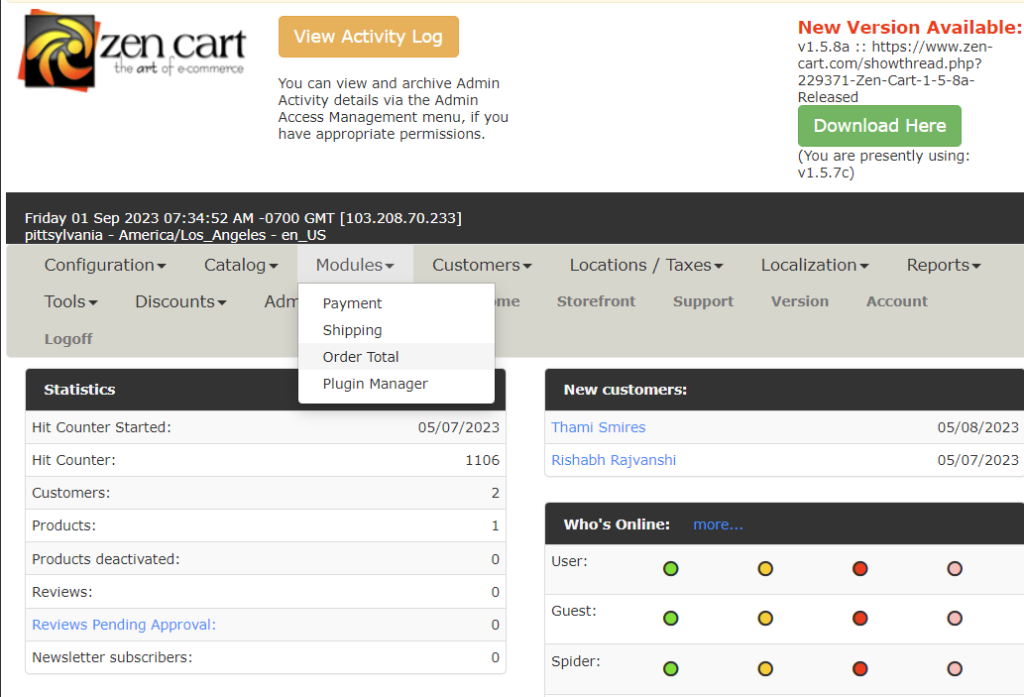
- Within the list of Order Total Modules, locate the “Charge Anywhere” module. When you find it, click Install Module.

Step 6: Configure the Extension
Once the extension is installed, navigate to the Charge Anywhere payment settings page in your ZenCart store’s admin panel. Enter the Charge Anywhere Merchant ID, Terminal ID, and Secret, and click Update to save the changes.
Note: If you don’t have the necessary API credentials, refer to how to retrieve Merchant ID, Terminal ID, and Secret for obtaining Charge Anywhere Plugin credentials.
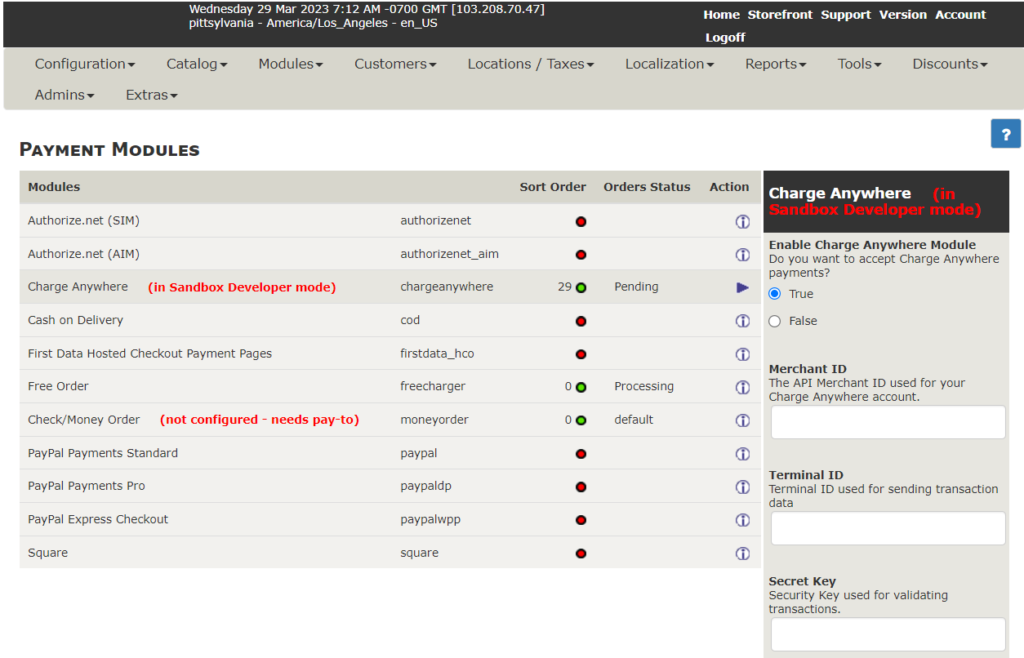
Charge Anywhere Payment Gateway Configuration Table Description: This table lists the attributes that can be configured for the Charge Anywhere Payment Gateway, along with their descriptions and available options. These attributes can be customized based on your business requirements and preferences to provide a smooth and secure payment experience for your customers.
Charge Anywhere Payment Gateway Configuration Form
This table lists the attributes that can be configured for the Charge Anywhere Payment Gateway, along with their descriptions and available options. These attributes can be customized based on your business requirements and preferences to provide a smooth and secure payment experience for your customers.
| Attribute | Description | Options |
|---|---|---|
| Enable Charge Anywhere Module | This option allows you to enable or disable the Charge Anywhere Payment Module. | On/Off |
| Merchant ID | This attribute requires you to enter the Merchant ID provided by Charge Anywhere. | Unique identification number provided by Charge Anywhere |
| Terminal ID | This attribute requires you to enter the Terminal ID provided by Charge Anywhere. | Unique identification number provided by Charge Anywhere |
| Secret | This attribute requires you to enter the Secret used to Authenticate the request with Charge Anywhere. | Secret key used for secure communication between your website and Charge Anywhere |
| Transaction Mode | This attribute allows you to select the Transaction Mode. | Sandbox/Developer API Mode or Live/Production API Mode |
| Authorization Type | This attribute allows you to select authorized only, or captured immediately. | Authorize or Capture |
| Customer Notifications | This attribute allows you to enable or disable sending a default notification to the customer from Charge Anywhere. | On/Off |
| Merchant Notifications | This attribute allows you to enable or disable sending a default notification to the merchant from Charge Anywhere. | On/Off |
| Accept Credit | This attribute allows you to enable or disable accepting credit cards as a payment method. | On/Off |
| Accept ACH | This attribute allows you to control the level of debugging information generated by the Charge Anywhere Payment Module. | Off/Alerts Only/Log File/Log and Email |
If credit card payments are enabled you will see the following options:
| Attribute | Description |
|---|---|
| Add Service Fee | This attribute allows you to enable or disable adding a service fee to the payment amount. |
| Service Fee Label | This attribute allows you to set the label for the service fee. |
| SF | This attribute allows you to set the default service fee percentage. |
| Service Fee Percentage (%) | This attribute allows you to set the service fee percentage for a specific transaction. |
| Include Tax Amount in Service Fee Calculation | This attribute allows you to include the tax amount in the service fee calculation. |
| Refund Service Fee on a Return | This attribute allows you to enable or disable refunding the service fee in case of a return. |
| Add Convenience Fee | This attribute allows you to enable or disable adding a convenience fee to the payment amount. |
| Convenience Fee Label | This attribute allows you to set the label for the convenience fee. |
| Convenience Fee Amount ($) | This attribute allows you to set the convenience fee amount for a specific transaction. |
| Refund Convenience Fee on a Return | This attribute allows you to enable or disable refunding the convenience fee in case of a return. |
If ACH payments are enabled you will see the following options:
| Attribute | Description |
|---|---|
| Add Service fee | This attribute allows you to add a service fee for ACH payments. |
| Service Fee Label | This attribute requires you to enter the label for the Service Fee. |
| Service Fee Percentage (%) | This attribute requires you to enter the percentage amount of the Service Fee for ACH payments. |
| Include Tax Amount in Service Fee Calculation | This attribute allows you to include the tax amount in the Service Fee calculation. |
| Refund Service Fee on a Return | This attribute allows you to enable or disable refunding the Service Fee when a return is made. |
| Add Convenience Fee | This attribute allows you to add a convenience fee for ACH payments. |
| Convenience Fee Label | This attribute requires you to enter the label for the Convenience Fee. |
| Convenience Fee Amount ($) | This attribute requires you to enter the fixed amount of the Convenience Fee for ACH payments. |
| Refund Convenience Fee on a Return | This attribute allows you to enable or disable refunding the Convenience Fee when a return is made. |
Step 7: Test the Extension
Before going live, it’s essential to test the Charge Anywhere ZenCart Extension to ensure that it’s functioning correctly. You can perform a test transaction using a test credit card to verify that the payment processing is working as expected.
The Charge Anywhere ZenCart Extension is a powerful payment processing solution that simplifies the payment process for merchants and customers. The extension offers a range of payment options and e-commerce solutions. By following the steps outlined in this article, you can easily install and configure the Charge Anywhere ZenCart Extension on your ZenCart store and start accepting payments securely and efficiently.
Capture or Refund
To capture a payment or issue a refund in Zen Cart, begin by accessing the Main Menu, then navigate to Customers, select Orders, and click on Order “Details.” Here, you can set the order status to “Refund” or “Complete” based on your specific transaction needs.
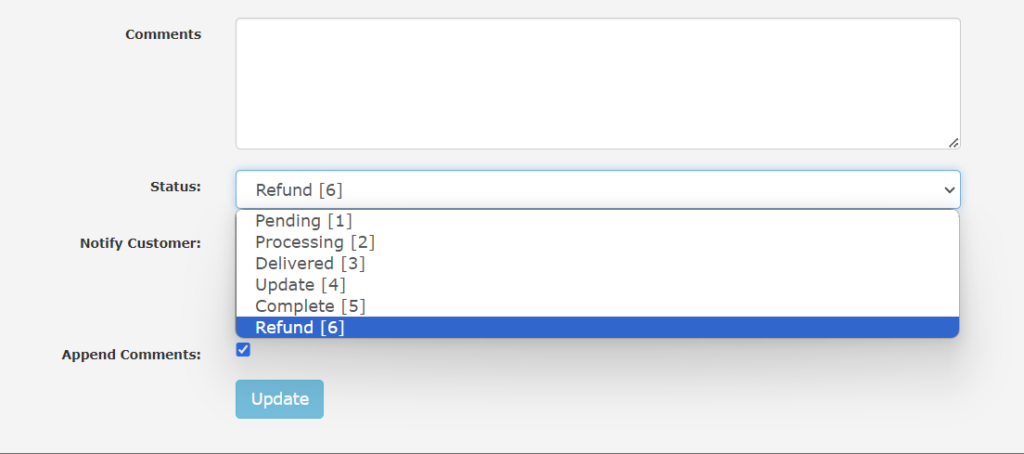
This action will either finalize the payment or initiate the refund process, depending on the status selected. Be sure to confirm the refund amount and reason as necessary. Please note that payments which are authenticated only cannot be refunded. Also, setting up the status as “complete’ of a payment that is already captured won’t affect the ledger. It’s essential to maintain transparent communication with customers concerning any payment-related actions taken on their orders.