1. Introduction
The QuickSale Q3 PinPAD solution is a dual-application system designed to separate the merchant’s point-of-sale interface from the customer’s payment interaction. This architecture enhances security, supports social distancing, and provides a professional checkout experience.
- Merchant-Facing App: Managed by the clerk to input sale amounts and manage business operations.
- Client-Facing App (PinPAD): A dedicated customer terminal for secure card insertion, tapping, and PIN entry.
Explore the QuickSale 2.0 Release Notes for a detailed breakdown of the latest features, system enhancements, bug fixes, feature deprecations, and much more.
Quick Navigation: To see a chronological history of all recent changes, please view the Change Log at the bottom of this document.
2. Registration
As with standard QuickSale 2.0 installations, the registration process is required only for the Merchant-Facing device to activate the processing license.
1. Getting Started
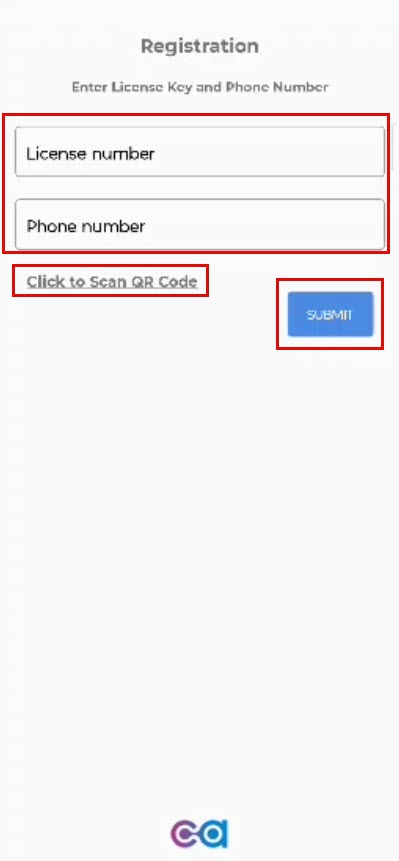
Open the app on your device, and you’ll be prompted to enter your registration credentials.
2. Credentials
- Manual Entry: Enter your license number and phone number in the respective fields to register and access the app. Accurate information is crucial for a successful registration process.
- Scan QR Code: Alternatively, tap the Click to Scan QR Code option to scan a QR code containing your registration credentials. This feature simplifies the registration process by auto-filling your details and automatically submitting them without the need for further action.
3. Submit
- If you’ve entered your details manually, tap Submit to complete the registration process and log into your account.
- For QR Code registration, submission is automatic, and you will be logged in without additional steps.
2.2 Preparing the Client-Facing App
The Client app does not require a separate registration process. To prepare it for use:
- Ensure the device is powered on and the PinPAD app is launched.
- Connect the device to the same local network (Wi-Fi) or physically link it to the merchant device via a supported cable (Serial/USB).
3. Initial Device Configuration
To enable communication between the two devices, both must be configured to “listen” and “speak” to each other using the same protocol.
3.1 Configuring the Client-Facing App (PinPAD)
Before the merchant app can send data, the Client app must be set to the correct communication mode.
- Launch the Client-Facing app.
- Tap the Logo at the center of the screen six (6) times in rapid succession.
- Select the Connection Options from the hidden menu.
- Choose your preferred method (TCP, Bluetooth, USB, or Serial). For this demo and most wireless setups, select TCP.
Note the Details: If using TCP, the screen will display the device’s IP Address. Note this down for the next step.

3.2 Environment Selection (Production vs. Testing)
The Merchant app contains a hidden menu to toggle between the live Production environment and the Sandbox/Testing environment.
- Tap the Company Logo at the top of the screen six (6) times in rapid succession.
- Immediately tap the Transaction Settings menu item two (2) times.
- On the page that appears, choose between Production or Testing.
- Click Submit to apply the environment change.
3.3 Configuring the Merchant-Facing App
Once the Client app is ready, link the Merchant app:
- Open the Merchant-Facing app and tap the Menu icon.
- Navigate to Configuration > Equipment Setup.
- Tap Card Reader.
- Choose Connection Type: Match the selection made on the Client device:
- TCP: Enter the IP address noted from the Client device.
- USB/Serial: Ensure physical cables are seated and select the corresponding port.
- Tap Confirm to initialize the handshake.
4. Standard Transaction Workflow
The Q3 PinPAD solution automates the “hand-off” between the merchant and the customer to reduce errors and improve security.
Note: For the list of supported transactions, refer to the Section 5 of the QuickSale 2.0 User Guide.
Processing a Sale
- Merchant Side: Select Sale from the main menu and enter the transaction amount.
- Amount Transfer: Upon clicking Confirm, the amount is instantly transmitted to the Client-Facing device.
- Client Interaction: The PinPAD prompts the customer: “Please Tap or Insert Card”.
- PIN Entry: If required, the customer enters their PIN securely on the PinPAD.
- Completion: Once authorized, an Approved message appears on the merchant device.
5. Advanced Configuration
For a truly detailed setup, use the following configuration sections as found in the QuickSale 2.0 User Guide.
Optional Prompts & Business Rules
- Taxes & Tips: Configure automatic tax rates or enable on-screen tipping prompts by navigating to Configuration > Set Up Options > Optional Prompts.
- Clerk Tracking: Enable Clerk# Prompt to track sales performance by individual staff members.
- Fee Programs: Set up Surcharges or Cash Discounts to automatically adjust the total based on the payment method used.
Security & Fraud Control
Access these settings via Configuration > Security:
- Manager Override: Require a manager PIN for high-value refunds or specific restricted features.
- Card Security (AVS/CVV): Customize when the app asks for Address Verification or CVV codes, especially for manual entry.
- HALO Limits: Set a “High Amount Limit Order” to prevent accidental or fraudulent entry of excessively large transactions.
6. Maintenance & Reporting
- Transaction Logs: View, Void, or Refund past transactions by selecting Transaction Logs from the main menu.
- Daily Reports: Generate EDC Daily or Clerk Summary reports to reconcile daily totals.
- Batch Management: The system typically closes batches automatically at the end of the day, but you can manually settle by selecting Close Batch.
7. Detailed Feature Cross-Reference
For features not explicitly covered here, the Q3 PinPAD app utilizes the same logic as the standard QuickSale 2.0 interface. For a detailed explanation of all the features, refer to the corresponding sections in the QuickSale 2.0 user guide.
Troubleshooting & Support: Contact support@chargeanywhere.com or refer to the Troubleshooting appendix.
Change Log
| Date | Update Summary |
| February 26, 2026 | Added a link to the QuickSale 2.0 Release Notes in the Introduction section. |
Get a monthly summary of technical document updates.