The Charge Anywhere Magento Extension is a powerful payment gateway integration that allows merchants using Magento to securely process payments through the Charge Anywhere platform. This extension provides seamless integration, advanced features, and secure payment processing capabilities, enhancing the overall payment experience for both merchants and customers.
Benefits of Charge Anywhere Magento Extension
- Secure Payment Processing: The Charge Anywhere Magento Extension ensures secure payment processing by leveraging the robust security features of the Charge Anywhere platform. This helps merchants protect sensitive customer payment data and build trust with their customers.
- Seamless Integration: The extension offers seamless integration with Magento, allowing merchants to easily set up and configure the payment gateway without any complex coding or technical expertise. This saves time and effort during the integration process.
- Increased Payment Options: By integrating with Charge Anywhere, merchants can offer a wide range of payment options to their customers, including credit cards, debit cards, and other alternative payment methods. This helps to improve customer convenience and increase conversion rates.
- Customizable Payment Experience: The extension allows merchants to customize the payment experience according to their branding and requirements. They can add their logo, customize the payment form, and provide a consistent checkout experience to their customers.
- Advanced Reporting and Analytics: The extension provides detailed reporting and analytics features, allowing merchants to gain insights into their payment transactions. They can track sales, monitor payment trends, and make data-driven decisions to optimize their business processes.
Features of Charge Anywhere Magento Extension
- Secure Tokenization: The extension utilizes secure tokenization to tokenize and store customer payment data securely. This reduces the risk of data breaches and ensures PCI compliance.
- Payment Mode Options: The extension supports two payment modes – SIP-Basic and SIP-Advanced. SIP-Basic redirects customers to the Charge Anywhere payment gateway for payment collection, while SIP-Advanced collects payment information directly on the Magento checkout page.
- Transaction Modes: Merchants can choose between two transaction modes – “Authorize Only” and “Authorize and Capture.” The “Authorize Only” mode authorizes the payment without capturing it, while the “Authorize and Capture” mode authorizes and captures the payment simultaneously.
- Configuration Options: The extension provides a user-friendly configuration panel in the Magento admin panel. Merchants can easily enable or disable the payment method, set the title, define the sort order, and configure API mode, merchant ID, terminal ID, secret, and version.
Steps to install Charge Anywhere Magento Extension
Installing the Charge Anywhere Magento extension is an easy and straightforward process that can be completed in just a few steps. In this article, we will provide a step-by-step guide to help you install the Charge Anywhere CubeCart extension on your Magento store.
Step 1: Download the Charge Anywhere Extension
The first step is to download the Charge Anywhere Magento extension from the Charge Anywhere website. You will receive a zip file containing the extension.
Step 2: Extract the Zip File
Once you have downloaded the extension, extract the contents of the zip file to a folder on your computer. You can also refer, refer to this FTP connection guide for a step by step instructions on making a connection to your server, using FTP.
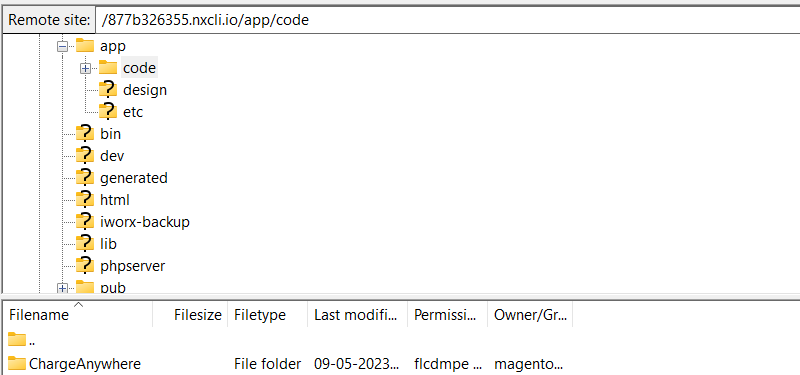
Step 3: Upload the Extension to your Magento Store
Using an FTP client, upload the extracted extension folder to the directory “/app/code/”. If you are unsure how to do this, contact your hosting provider for assistance.
Step 4: Enable the module using CLI
a. Change Directory to the root of the website. For example:
cd /var/www/public_html/b. Enable the module by running the following command:
php bin/magento module:enable ChargeAnywhere_PaymentGatewayc. Run the setup upgrade command to update the Magento database:
php bin/magento setup:upgraded. Compile the code and dependencies:
php bin/magento setup:di:compilee. Deploy static assets such as CSS and JavaScript files:
php bin/magento setup:static-content:deployf. Clear the cache to ensure the changes take effect:
php bin/magento cache:flushStep 5: Configure the Extension
By following these steps and navigating to the mentioned location in the admin menu, you will be able to configure the settings related to the “ChargeAnywhere PaymentGateway” for your store.
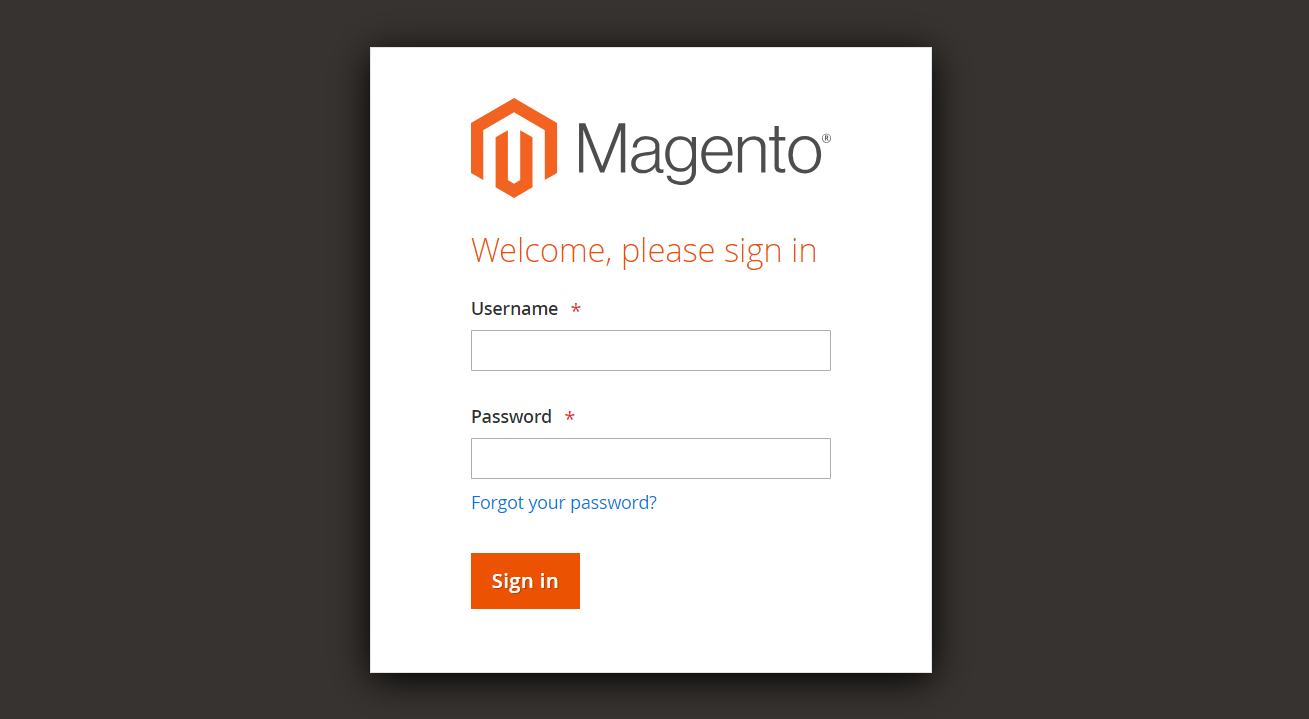
1. Log in to your Magento 2 admin panel.
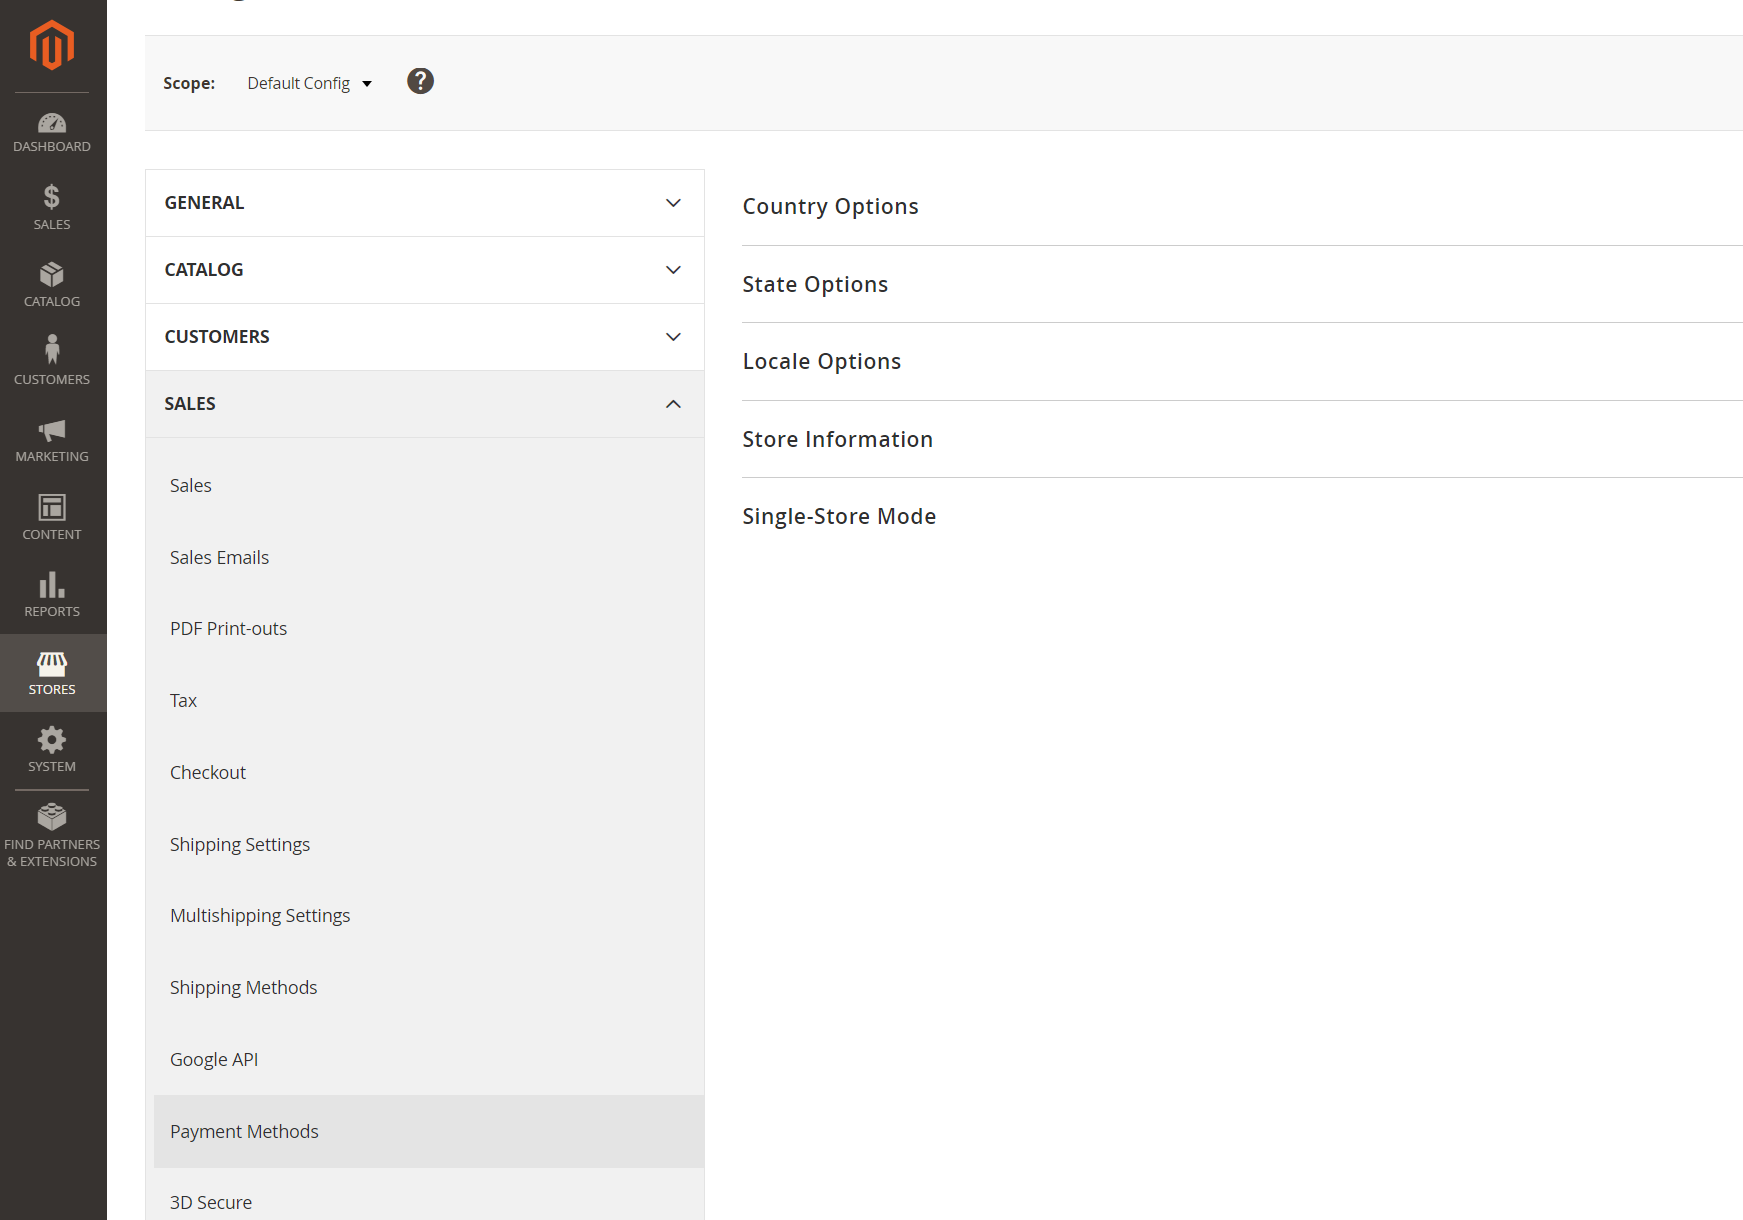
2. Go to the admin panel of your website or application and click Stores in the menu.
3. From the expanded menu, select Configuration. This will open the configuration settings for your store.

4. In the configuration settings, find and click Sales. It usually appears under the Sales section in the main menu or in a sidebar.
5. Within the Sales options, locate and click Payment Methods. This will display the available payment methods for your store.
6. Scroll down or navigate through the list of payment methods Click ChargeAnywhere PaymentGateway to access the specific settings for this payment gateway.
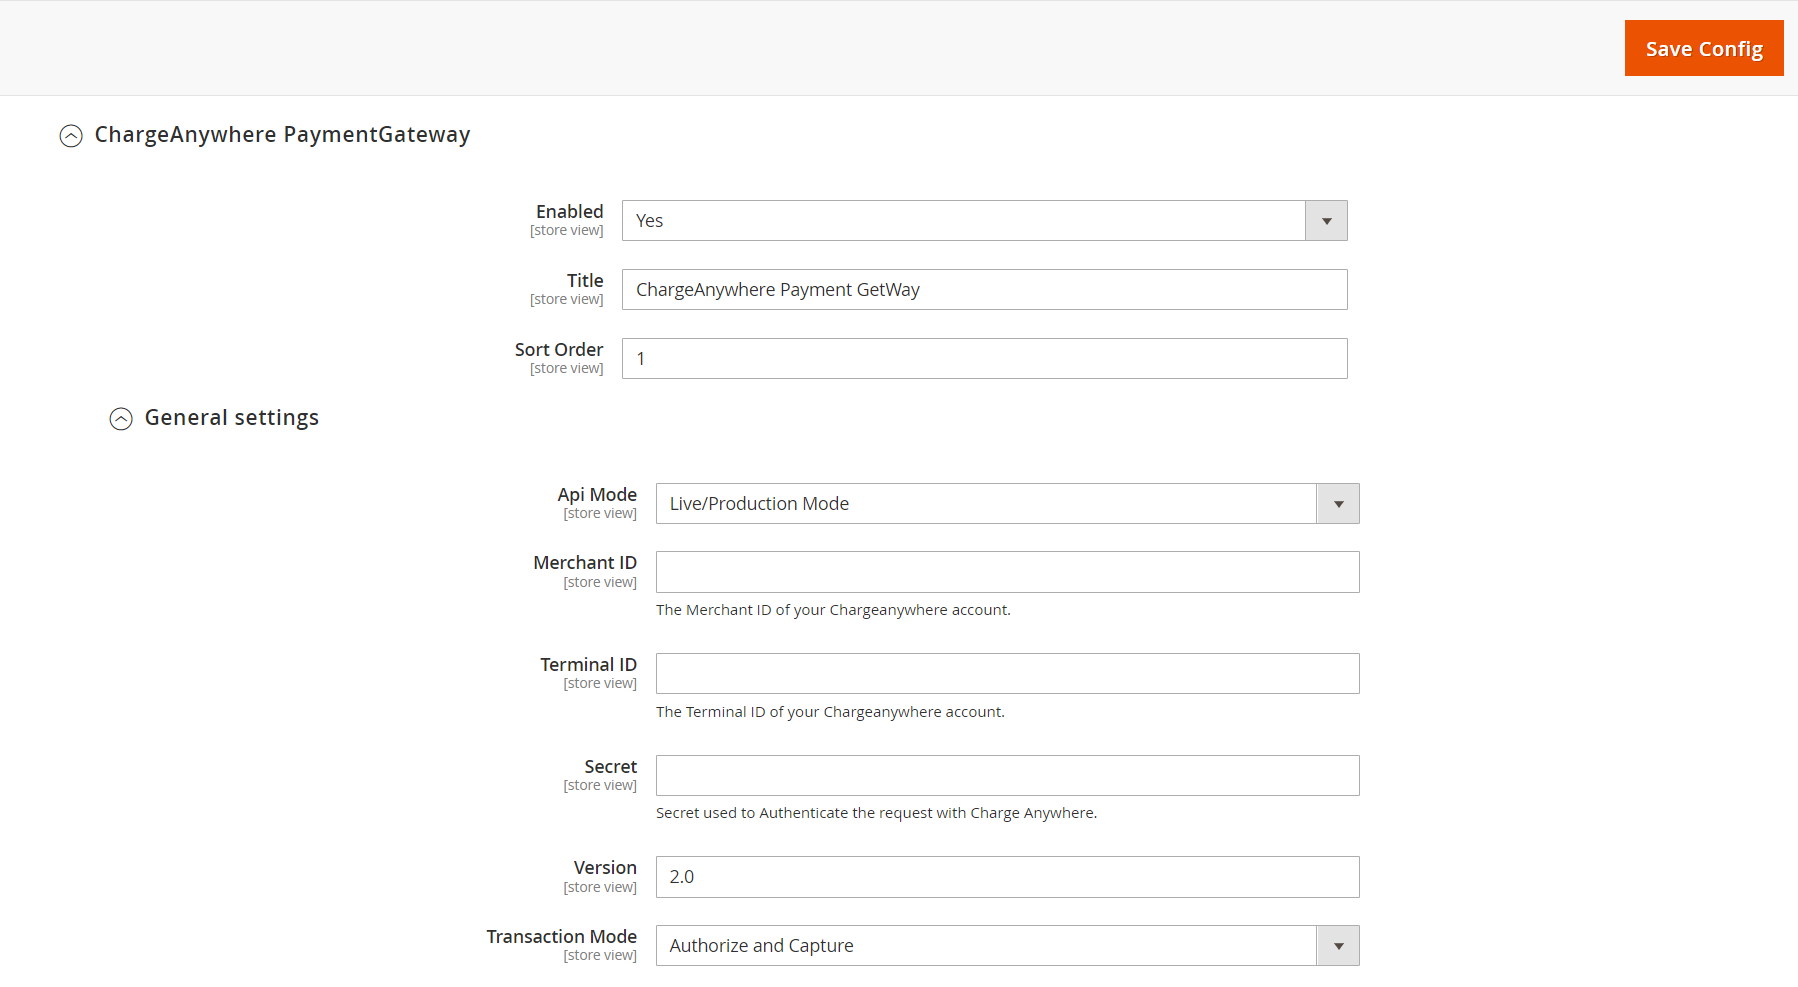
In the configuration settings, you will find the following options:
- Enable: Set it to “Yes” or “No” to enable or disable the payment method.
- Title: Enter the name of the payment method as it should be displayed on the front end.
- Sort Order: If you have multiple payment methods enabled, set the sort order for this one.
Below the General Settings, you will find the following options that you need to obtain from Charge Anywhere:
Note: If you don’t have the necessary API credentials, refer to how to retrieve Merchant ID, Terminal ID, and Secret for obtaining Charge Anywhere Plugin credentials.
- API mode: Choose “Developer” mode for testing or “Production” mode for capturing real payments.
- Merchant ID: Enter the Merchant ID of your Charge Anywhere account.
- Terminal ID: Enter the Terminal ID of your Charge Anywhere account.
- Secret: Enter the Secret used to authenticate the request with Charge Anywhere.
- Version: Set it as “2.0”.
- Transaction Mode:
- Authorize only: The user’s payment will only be authorized but not captured. Admin can manually capture the payment from the order detail page.
- Authorize and capture: The payment will be authorized and captured at the same time. An invoice will be automatically generated and sent to the customer.
Save the configuration
That’s it! You have successfully installed and configured the Charge Anywhere Payment Gateway on your Magento store.
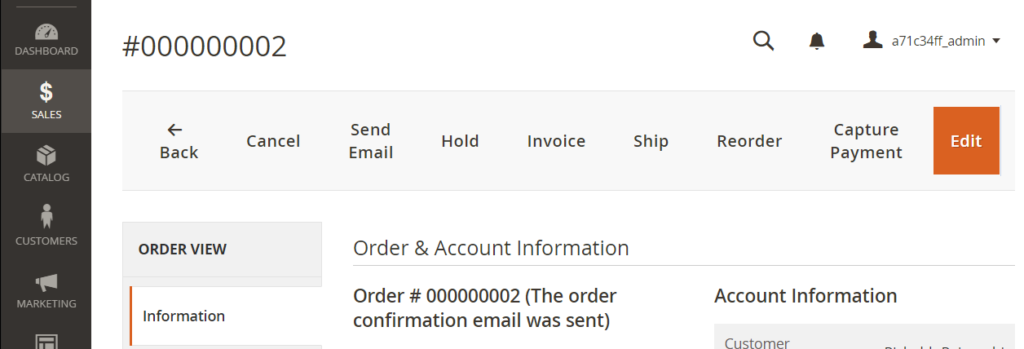
Capture
To capture (force) a payment in Magento, follow these steps: Access the Main Menu, navigate to Sales, select Orders, and click on the specific order you wish to capture payment for. From the order menu, click Capture Payment. This action will finalize the payment process for the selected order, ensuring that the funds are transferred to your account.
Refunds
For processing refunds in Magento, take the following steps: Access the Main Menu, go to Sales, select Orders, and click on the specific order for which you want to issue a refund. From the order menu, click Credit Memo. After clicking OK at the prompt box, you’ll be directed to a New Memo page where you can process the refunds, specifying the refund amount and reasons as needed. This process allows you to efficiently manage refunds for your Magento orders.
