Introduction
This guide provides step-by-step instructions for merchants to configure the Remote Key Injection (RKI) process within the Charge Anywhere RKI portal. By the end of this workflow, you will have successfully mapped your physical payment terminals to the correct encryption keys, enabling them to securely process transactions.
How RKI Works: The Top-Level Flow
Remote Key Injection (RKI) is the secure delivery of highly sensitive encryption keys (such as PIN decryption keys) to payment terminals over the internet. This eliminates the need to physically connect machines to a secure server to load keys manually.
From a high-level perspective, the RKI process follows this simple logic:
- Hardware Registration: You log your physical terminal’s unique Serial Number into the portal so the server recognizes it as a trusted device.
- Software Assignment: You select the required pre-loaded encryption keys for your specific payment application.
- The Link (RKI Profile): You create a rule in the portal that states, “When this specific terminal connects, give it these specific keys.”
- The Secure Handshake: Once configured, the terminal is powered on at your location. It connects to the Charge Anywhere server, proves its identity using its Serial Number, and securely downloads its assigned keys in an encrypted package.
Configuration Phases
To build this configuration, this guide will walk you through a four-phase workflow using the specific tools found within the portal:
- Phase 1: Application Setup: Register your payment software as an Application and define the structural format of the keys it requires.
- Phase 2: Creating a Terminal List: Build a group called a Terminal List and assign your physical hardware to it using their unique Serial Numbers.
- Phase 3: Creating a Key List: Build a group called a Key List and bundle the existing, pre-loaded encryption keys that your terminals are authorized to receive.
- Phase 4: Creating the RKI Profile: Generate the final RKI Profile, which serves as the master rule that formally links your Terminal List to your Key List.
Navigating the RKI Portal (Interface Overview)
The Charge Anywhere RKI Portal is designed with a top navigation bar that houses the four primary sections you will use to configure your devices. Think of the first three sections as your inventory, and the fourth section as your command center.
- Application Management: This is your software directory. Here, you register the specific payment applications (e.g., Castles Pay, QuickSale) that your terminals use and define the format of the keys those applications require.
- Terminal Management: This is your hardware inventory. This section is strictly for registering the physical devices you own by entering their unique Serial Numbers.
- Key Management: This is your secure vault. As a merchant, you will use this section primarily as a read-only directory to view the pre-loaded, highly secure encryption keys authorized for your use.
- Customer Management: This is the core configuration hub. This is where you tie your hardware (terminals) and software (keys) together.

Phase 1: Application Setup
Before defining terminals or keys, you must register the payment application running on your devices.
Step 1.1: Create the Application
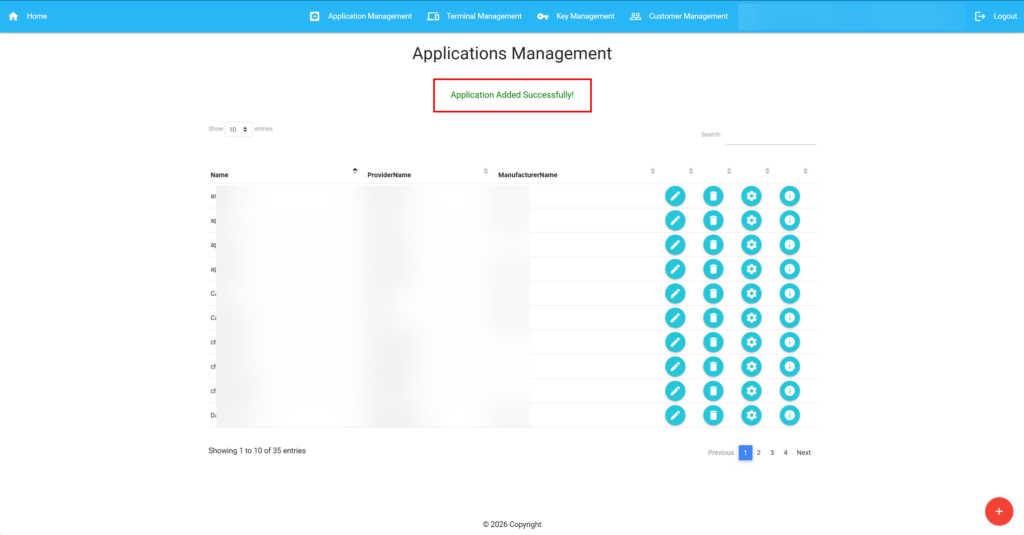
1. Navigate to Application Management from the top menu bar.
2. Hover over the large red button in the bottom right corner to expand the menu, then click the smaller Add (+) button.

3. Select the terminal Manufacturer from the dropdown menu (e.g., Castles).
4. Enter the Name of the application (e.g., Demo_New_App).
5. Enter the Provider Name.
6. Click Submit.

A success message is displayed: Application Added Successfully!
Step 1.2: Configure Application Keys
Once the application is created, you must define the key structure it uses.
1. On the Application Management screen, locate your newly created application.
2. Click the Key Configuration (Gear) icon in that row.

3. Hover over the large red button in the bottom right corner to expand the menu, then click the smaller Add (+) button.

4. Provide a Description for the key structure (e.g., Demo_Key_PIN_New).
5. Select the Key Purpose from the dropdown (e.g., PIN Encryption).
6. Check the HEX box if applicable to your key format.
7. Enter the exact Key Index and Key Set values required by your application.
8. Click Submit.

A success message is displayed: Application Key Configuration Added Successfully!

Phase 2: Terminal (Hardware) Grouping
Instead of configuring terminals individually, you will create a “bucket” (a Terminal List) and assign your physical hardware to it.
Step 2.1: Create a Terminal List
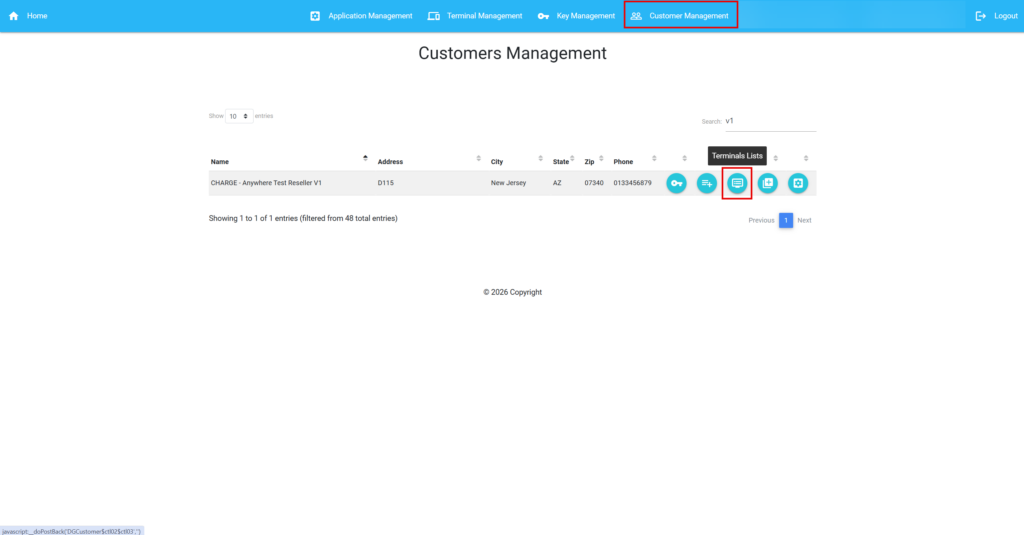
1. Navigate to Customer Management.
2. Use the search bar to find your specific customer account (e.g., CHARGE – Anywhere Test Reseller V1).
3. Click the Terminals Lists (Monitor) icon next to your account.
4. Hover over the large red button in the bottom right corner to expand the menu, then click the smaller Add (+) button.

5. Select your customer name and the terminal Manufacturer.
6. Enter a unique Terminal List Name (e.g., Demo_Terminal_List).
7. Click Submit.

A success message is displayed: Terminal List Added Successfully!

Step 2.2: Assign Terminals to the List
Now, register your physical hardware and place it into the list you just created.
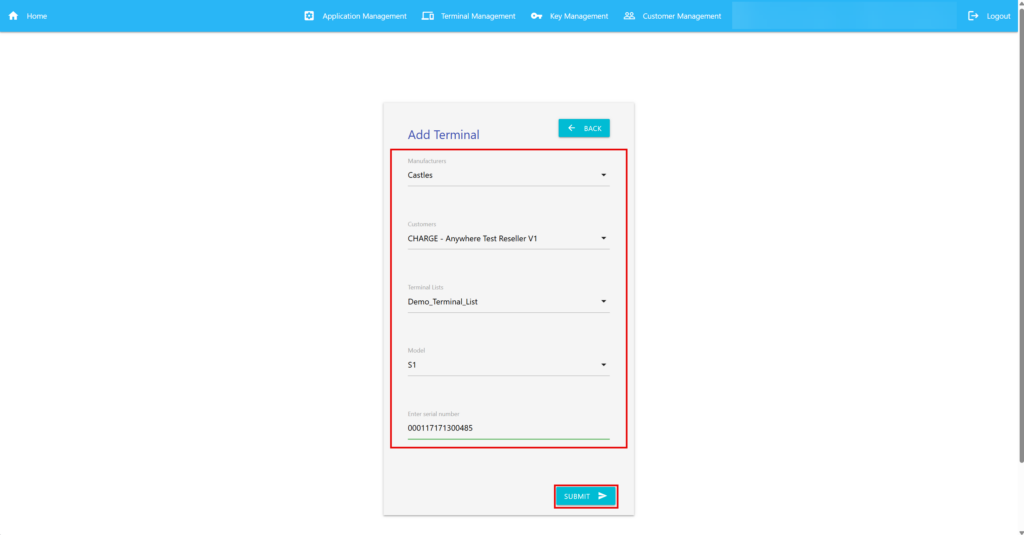
1. Navigate to Terminal Management from the top menu bar.
2. Hover over the large red button in the bottom right corner to expand the menu, then click the smaller Add (+) button.

3. Select the Manufacturer.
4. Select your Customer account.
5. In the Terminal Lists dropdown, select the list you created in Step 2.1 (e.g., Demo_Terminal_List).
6. Select the device Model (e.g., S1).
7. Enter the exact physical Serial Number of the device. Note: This must match the hardware exactly for RKI to succeed.
8. Click Submit.
The terminal is successfully added to the terminal list.

Phase 3: Key (Software) Grouping
Next, bundle your encryption keys into a list. Note for Merchants: You cannot create brand new encryption keys in this portal. You are only permitted to select and assign existing, pre-loaded keys to your lists.
Step 3.1: Create a Key List
1. Navigate back to Customer Management and locate your account.
2. Click the Keys Lists (List + Key) icon.

3. Hover over the large red button in the bottom right corner to expand the menu, then click the smaller Add (+) button.

4. Select your Customer account.
5. Enter a Key List Name (e.g., Demo_Key_List).
6. Select the Manufacturer and the Application you created in Phase 1.
7. Click Submit.

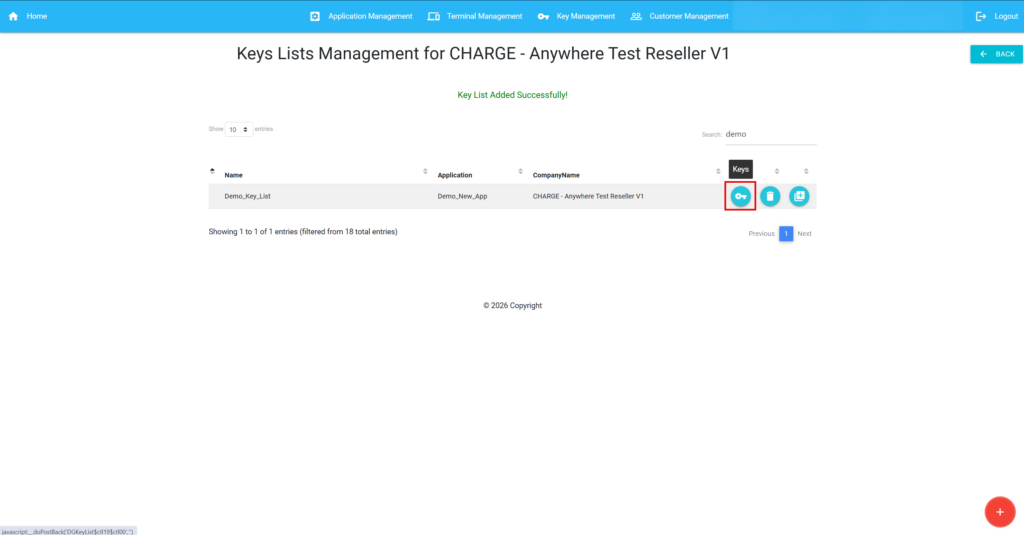
A success message is displayed: Key List Added Successfully!
Step 3.2: Add Existing Keys to Your Key List
1. On the Keys Lists Management screen, locate your newly created Key List.
2. Click the Keys (Key) icon in that row to open the key mapping screen.
3. Hover over the large red button in the bottom right corner to expand the menu, then click the smaller Add (+) button.

4. Select your Key List.
5. Select the Description you created during the App Setup phase.
6. Under Key, open the dropdown to view available pre-loaded encryption keys. Select the correct existing key (e.g., FD PIN TEST KEY).
7. Enter the associated KSN (Key Serial Number).
8. Click Submit.

A success message is displayed: KeyList/Key association Added Successfully!

Phase 4: The Final Mapping
The final step is to tie your Terminal List to your Key List. This generates the unique configuration the terminal will request when it powers on.
Step 4.1: Create the RKI Profile
1. Navigate to Customer Management and locate your account.
2. Click the RKI Profile (Document + Plus) icon.
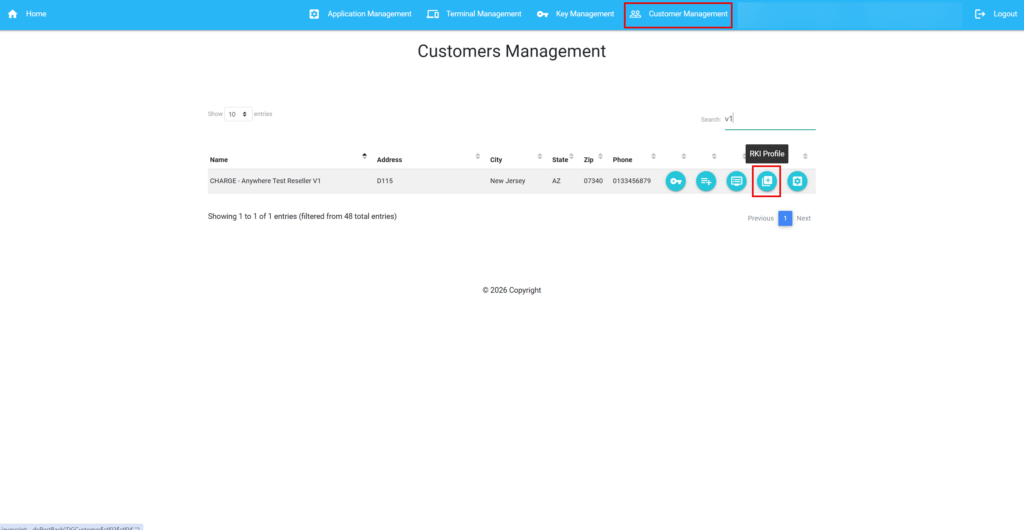
3. Hover over the large red button in the bottom right corner to expand the menu, then click the smaller Add (+) button.

4. Select the Application from Phase 1.
5. Select the Terminals List from Phase 2.
6. Select the Keys Lists from Phase 3.
7. Enter a distinct RKI Profile Name (e.g., Demo_RKI_Profile).
8. Click Submit.

A success message is displayed: RKI Profile Added Successfully!

Your RKI Profile is now active. When any terminal from your configured Terminal List connects to the internet and requests an RKI, the Charge Anywhere server will use this profile to securely inject the keys assigned to your Key List.
Get a monthly summary of technical document updates.