Overview
This guide walks you through the steps required to select a merchant in the Charge Anywhere Transaction Manager. Selecting a merchant is a mandatory step before accessing transaction data, virtual terminals, or generating reports. Without merchant selection, many functions in the navigation menu will remain inactive.
Prerequisites
Before starting, ensure the following:
- You are logged in as a registered Partner.
- You have access rights to the merchant(s) you wish to manage.
Step-by-Step Instructions
Step 1: Log in to Transaction Manager
- Open a supported browser and visit the following URL:
- Enter your Username and Password.
- Click Login to access the dashboard.

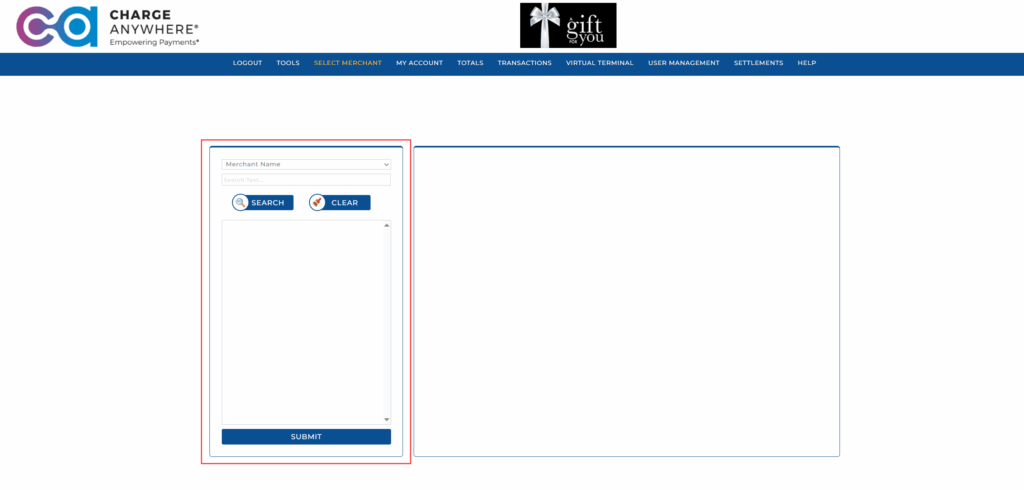
Step 2: Open the Merchant Selector
The Merchant Selector appears by default when you log in to Transaction Manager.
- If you’re on the dashboard or login landing page, the selector panel is already displayed on the left side of the screen. You can begin searching immediately without any additional steps.
However, if you have navigated to another module (e.g., Transactions or Virtual Terminal):
- Use the top navigation bar to click Select Merchant.
- This will reopen the Merchant Selector panel as a sidebar or popup.

This flexibility allows you to switch merchants at any time, regardless of your current location in the system.
Step 3: Search for the Merchant
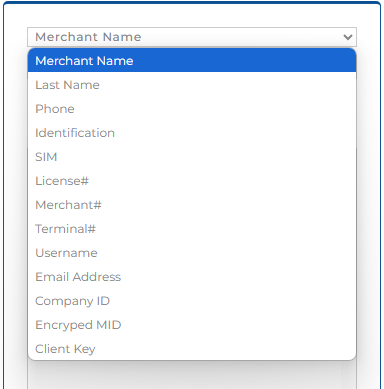
- In the Select Merchant panel, locate the dropdown field next to the search bar.
- From the dropdown, select the field you want to filter by, such as Merchant Name, Merchant ID, City, or Phone Number.
- In the adjacent Search Text field, enter the value or partial keyword you want to search for.
- Click Search.
The search results will now only show merchants that match your selected filter and keyword.
Tip: Use minimal input (e.g., just the first few letters of the merchant name) for broader results.

Here’s a complete table of Search Filters available in the Merchant Selector panel.
| Filter Name | Description |
|---|---|
| Merchant Name | Filters results by full or partial merchant business name. |
| Merchant ID | Filters by the unique ID assigned to each merchant during onboarding. |
| Company ID | Searches for merchants using their internal company ID. |
| City | Filters merchants based on their city of operation. |
| Phone Number | Searches merchants by their registered business phone number. |
| Email Address | Filters based on the merchant’s registered email address. |
| Processor | Filters merchants by their assigned payment processor (e.g., TSYS, First Data). |
| Gateway Merchant ID | Searches using the API reference identifier for the merchant. |
| Industry Type | Filters based on business type (e.g., Retail, Restaurant). |
| Status | Filters merchants by their operational status (e.g., Active, Inactive). |
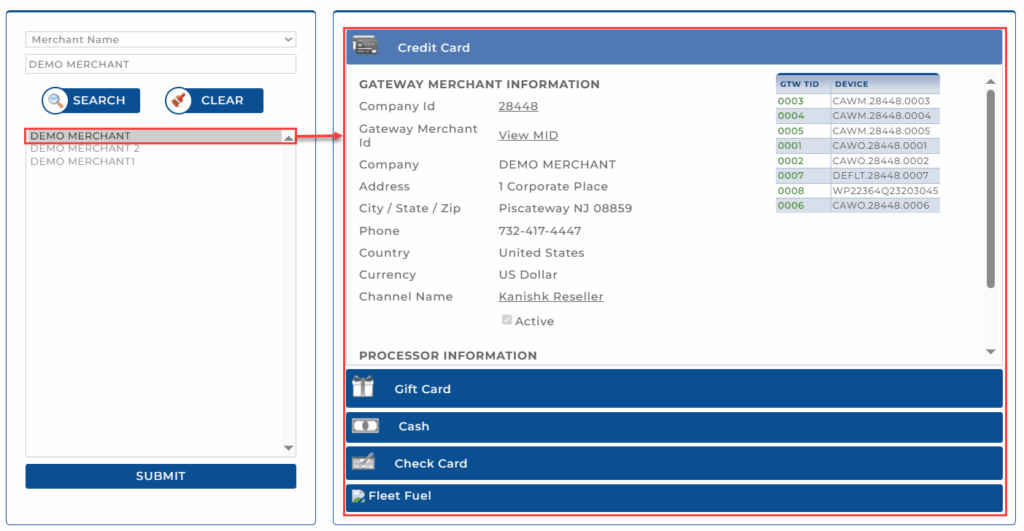
Step 4: Select and Submit
- From the search results:
- Either double-click the desired merchant
- Or select it and click Submit
- This sets the merchant as the active context for all further actions.

After selecting a merchant, the Gateway Merchant Information panel appears. It displays key business identifiers:
| Field | Description |
|---|---|
| Company ID | Unique ID of the company/merchant |
| Gateway Merchant ID | Unique ID used for API/system references |
| Company | Registered name of the merchant |
| Address, City, State, Zip | Official mailing address |
| Phone | Merchant contact number |
| Country & Currency | Region and transaction currency |
| Status | Should display Active |
| Devices | Lists all configured terminal IDs (GTW TIDs) |
| Processor | The active payment processor (e.g., TSYS) |
| Industry Type | Merchant’s sector (e.g., Retail, Restaurant) |
| Merchant ID | Unique Merchant Identifier |
Always confirm the accuracy of the selected merchant details before proceeding.
For a detailed walkthrough of this panel with field-level descriptions and annotated screenshots, refer to the Merchant Profile Overview.
What Happens After Merchant Selection?
After a merchant is selected, Transaction Manager updates to reflect that merchant’s environment, unlocking all relevant modules and actions. You can now view and edit the merchant profile, access and manage connected devices, retrieve API credentials, and process payments using the Virtual Terminal. Features like Bill Pay, Customer Vault, and Recurring Billing become available, along with fraud detection settings and transaction reporting. You can also generate batch reports, configure 2FA, and many more such features!
All actions performed now apply to the selected merchant.
Best Practices for Partners
- Verify merchant selection before initiating any transaction or configuration.
- Re-select the merchant after logging in again or switching tabs/tasks.
- Use search filters effectively when managing a large portfolio of merchants.
Support
For assistance with merchant access or selection issues:
- Phone: (800) 211-1256
- Email: support@chargeanywhere.com
Get a monthly summary of technical document updates.