1. Introduction
Batch transactions allow you to process multiple transactions at once by uploading a file with transaction data. This guide will walk you through the process of uploading and managing batch transactions in the Virtual Terminal.
Note: To know the list of predefined trigger values that can be used to test various transaction responses within Charge Anywhere, refer to the Trigger Values for Testing Transactions guide.
2. Steps to Process Batch Transactions
Step 1: Navigate to the Batch Transactions
- Login to Transaction Manager.
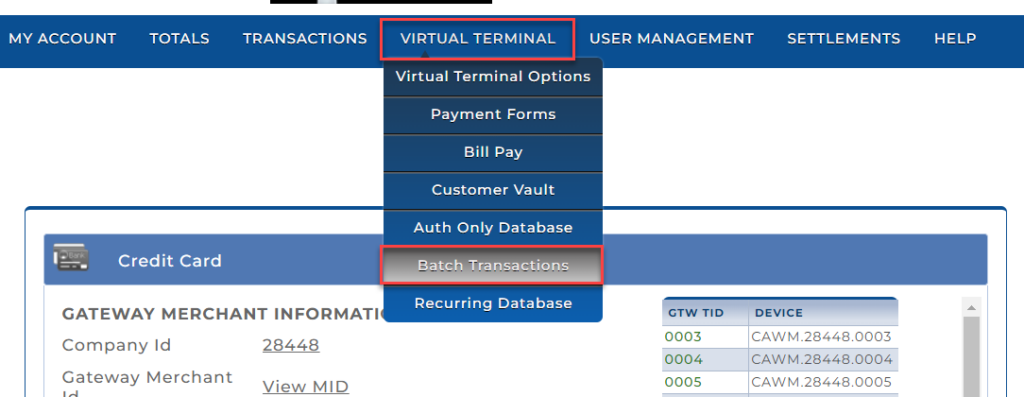
- Select Batch Transactions under Virtual Terminal in the top menu.
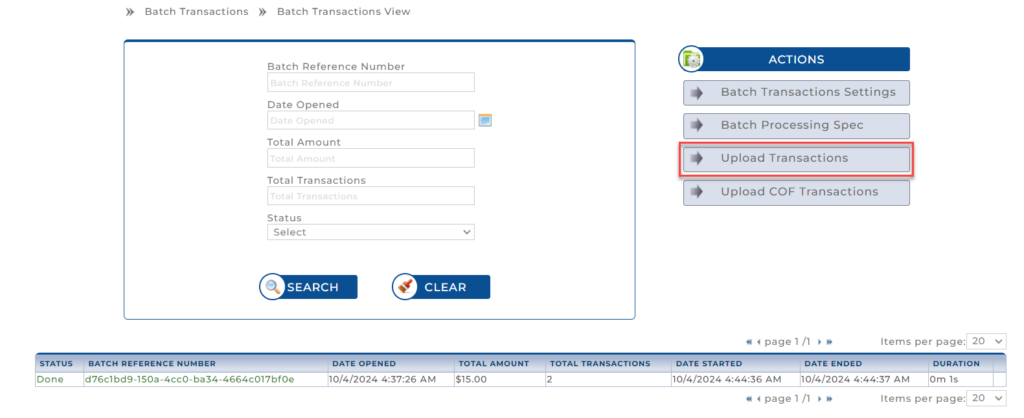
- Select Upload Transactions under Actions.
Step 2: Prepare Your File for Upload
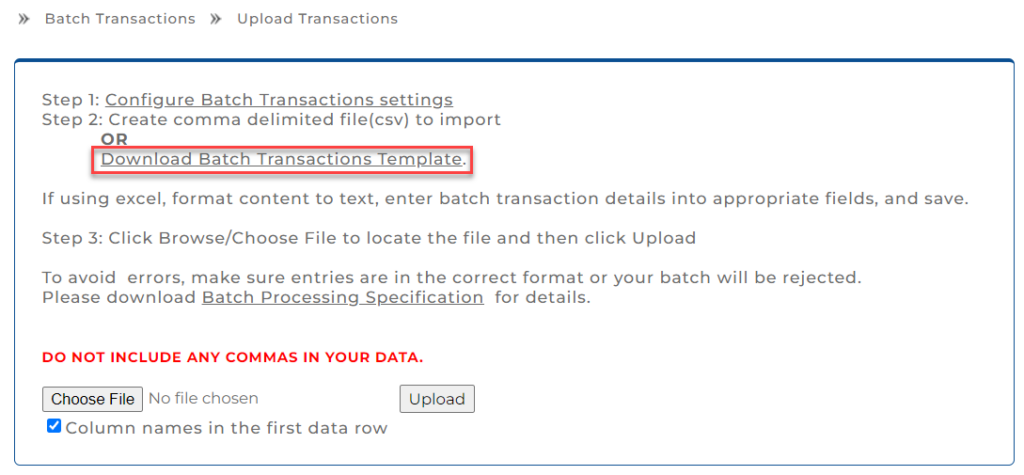
- Click the Download Batch Transactions Template to download the template file if you do not already have a file prepared.
- Refer to the Batch Processing Specifications document to ensure the data in your CSV file is in the correct format.
- Make sure all required fields like Transaction Type, Card Number, Expiration Date, and Amount are properly filled.

- Make sure all required fields like Transaction Type, Card Number, Expiration Date, and Amount are properly filled.
Step 3: Upload the Batch File
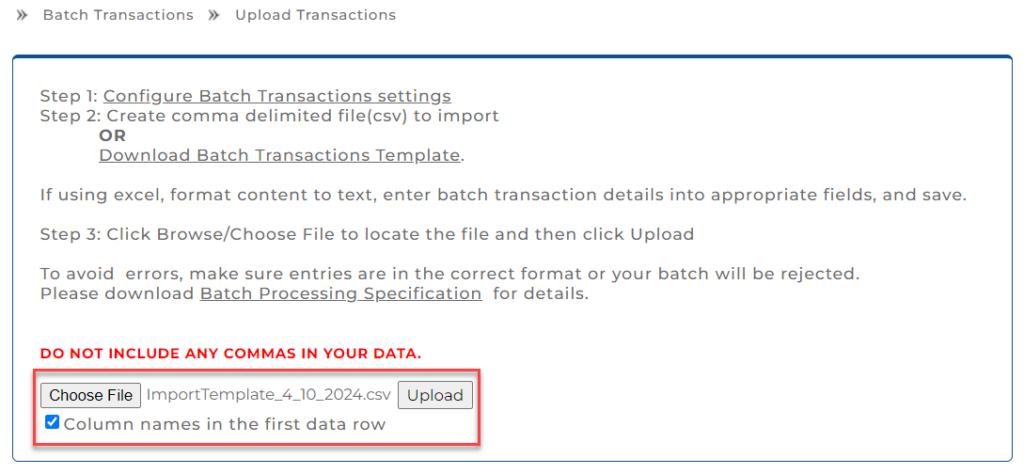
- Click Choose File and locate your batch file.
- Ensure the Column names in the first data row checkbox is selected if applicable.
- Click Upload.
- The system will verify the file format. If there are any errors in the file (such as missing or incorrectly formatted data), you will be prompted to correct them.
Step 4: Review the Uploaded Transactions
- After the successful upload, a list of transactions is displayed on the screen.
- Review the transactions to ensure everything is correct.
- If you do not want to process certain transactions, uncheck the corresponding box for that transaction.
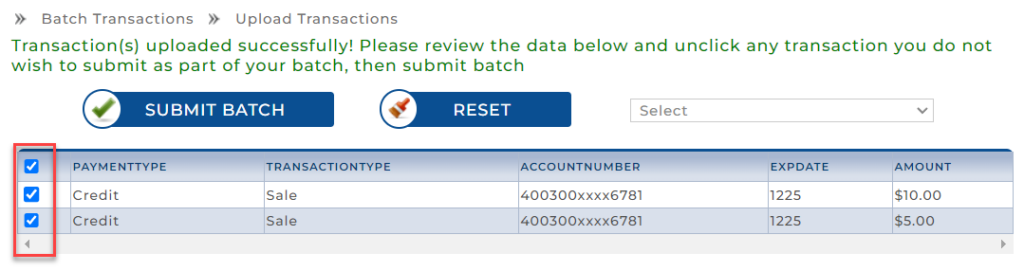
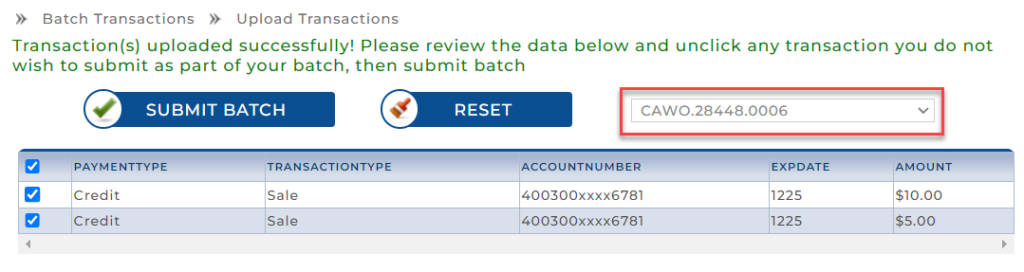
Step 5: Select the Device for Processing
- From the dropdown menu, select the device to process the transactions.
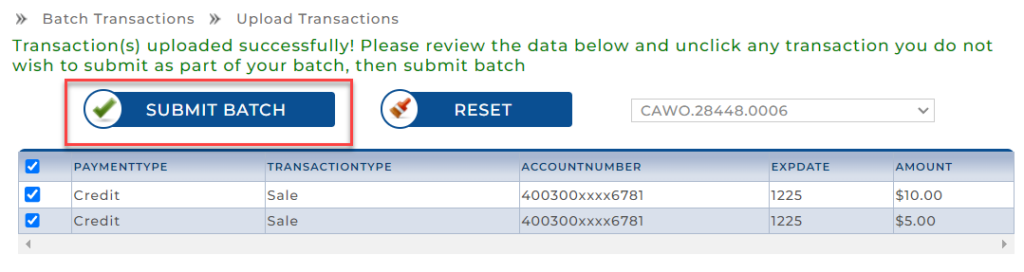
Step 6: Submit the Batch
- After reviewing the transactions and selecting the device, click Submit Batch.
- A confirmation screen appears with transaction details.
Step 7: Confirm the Batch
- Review the details on the confirmation screen.
- Click Confirm Batch to proceed with processing the transactions.

Step 8: View Batch Details
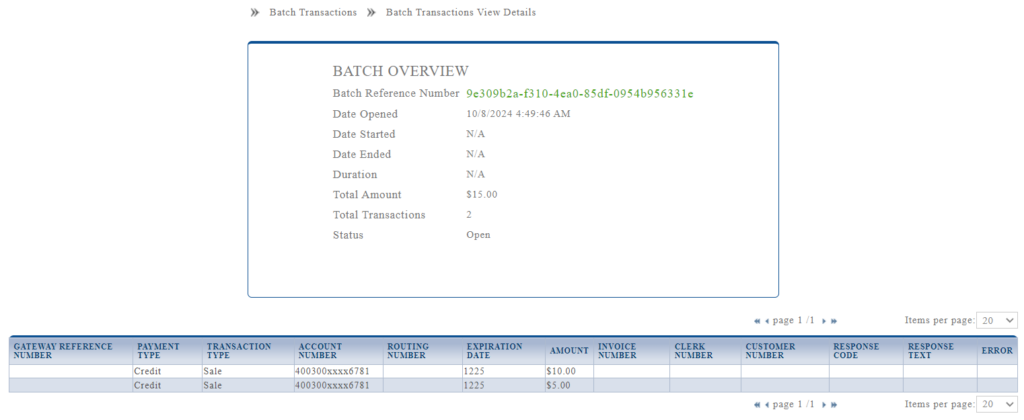
- After confirming, the batch is processed, and you can view the status of the batch.

- To review the batch, click Open to see detailed information, including transaction status, amounts, etc.
3. Related Virtual Terminal Guides
| If you want to… | See this guide |
| Configure hosted payment forms | Payment Form Guide |
| Integrate Payment Forms using API fields | Payment Form Specifications |
| Manage customer records and saved payment methods | Customer Vault User Guide |
| Import customer records in bulk | Customer Import Specifications |
| Send invoice payment links to customers | Bill Pay User Guide |
| Add or manage individual recurring payments | Recurring Database User Guide |
| Import recurring or installment records in bulk | Recurring and Installment Import Specifications |
| Manage authorization-only records | Auth Only Database User Guide and Specifications |
| Build batch files using technical file format | Batch Processing Specifications for Merchants |
4. Change Log
| Date | Update Summary |
| July 15, 2026 | Added Related Virtual Terminal Guides section. |
Subscribe to Documentation Updates
Get a monthly summary of technical document updates.